What are PyClone Assemblies?
PyClone Assemblies are a specific Blender data structure which is intended to define a parametric asset.
Parametric assets are assets that have the ability to change size in a logical way, they snap together with other assets in an intuitive way, and provide a number of controls that change the look and behavior of the asset.
The core structure is very simple, but using this structure provides users the ability to define very complex parametric assets.
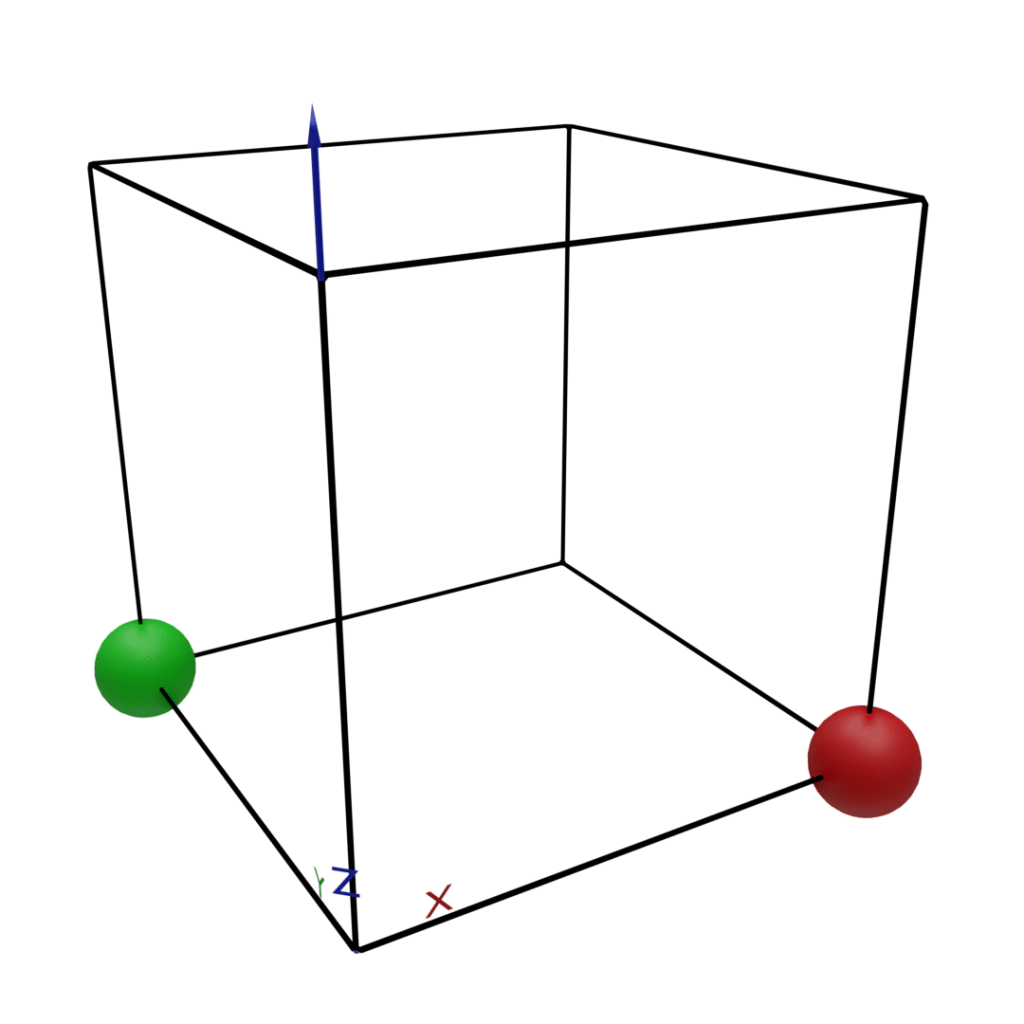
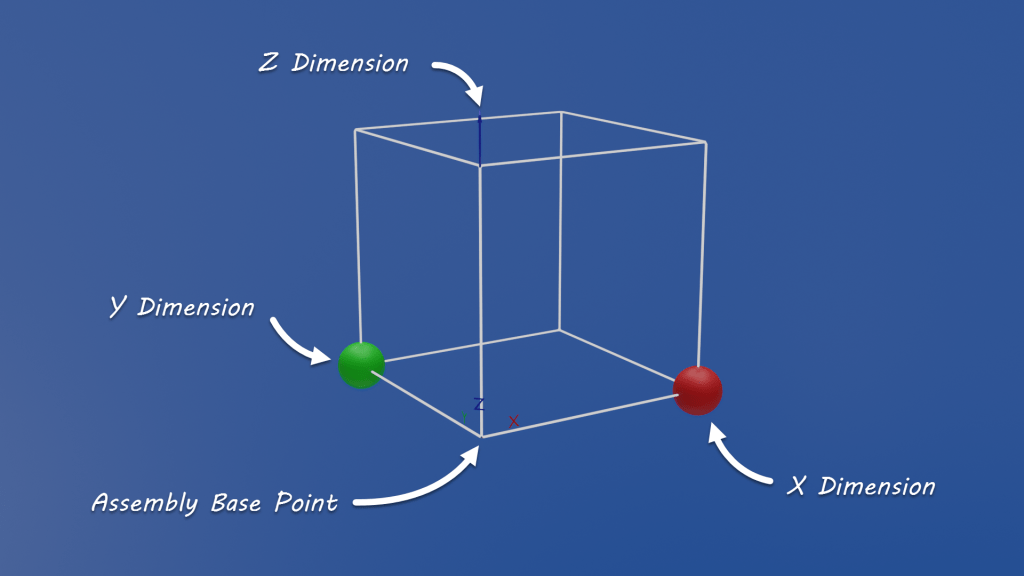
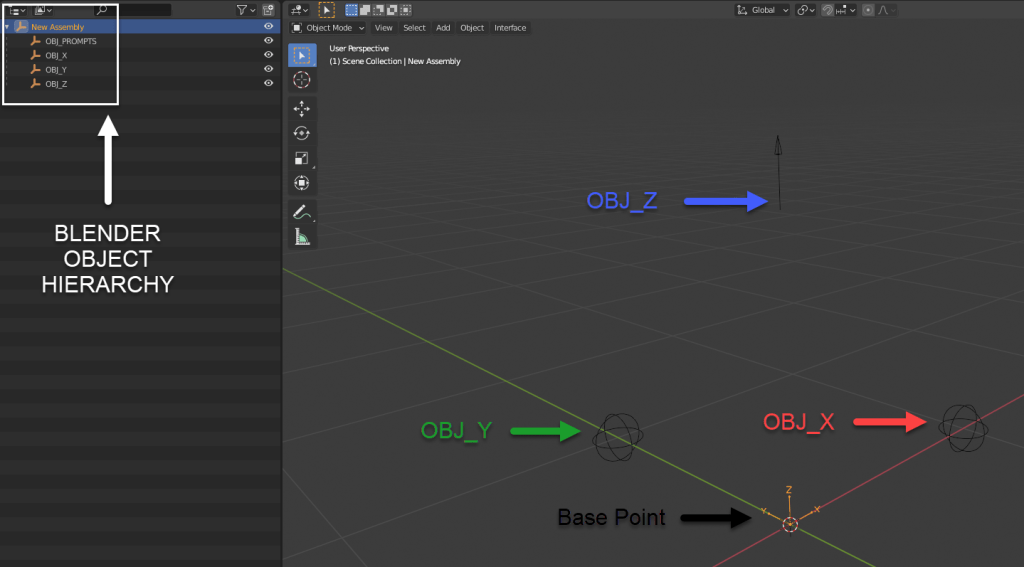
The minimum structure consists of 5 empties.
- Base Point – This is the base point of the assembly. All other objects in the assembly are parented to this object.
- X Dimension – This object controls the x dimension of the assembly.
- Y Dimension – This object controls the y dimension of the assembly.
- Z Dimension – This object controls the z dimension of the assembly.
- Prompts – This object stores prompts for the assembly.
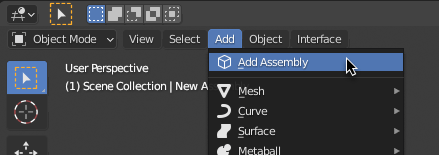
Creating an Assembly
You can create an assembly by clicking the Add Assembly button in the Add Menu at the top of the 3D Viewport. This will add the minimum structure of an assembly to the center of the 3D Scene.
Accessing Assembly Properties
If you select the base point of the assembly you will have access to the Assembly Properties Page in the right click menu. This interface is also accessible in the sidebar panel by using the “N” Hotkey.

- Main Tab – This shows you Location, Rotation, and Dimension properties of the assembly
- Prompts Tab – This shows you all of the prompts and calculators that are available in this assembly along with the ability to add and edit them.
- Objects Tab – This shows you all of the objects that are available in the assembly.
- Logic Tab – This shows you all of the drivers that are assigned to the assembly. The drop down allows you to view the drives of the location, rotation, dimension, prompts, calculators, and selected object of the assembly.
The Assembly Menu
In the top right corner of the assembly interface there is a drop down menu that contains several commands.
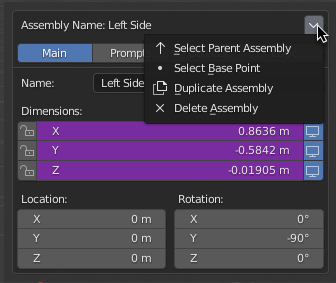
- Select Parent Assembly – It is possible to parent assemblies to other assemblies. If you add a cabinet in from the Home Builder library you will notice there are many assemblies nested to make up these assets. When selecting an object it will always show the lowest level assembly that is selected, but if you select this command it will open the parent assemblies properties. If the button is disabled then there is no parent assembly.
- Select Base Point – Since the Base point is typically a small object that is not easy to select you can use this command to quickly select the base point. Once the base point is selected you can use standard Blender commands like move, rotate, and scale.
- Duplicate Assembly – This will duplicate the assembly and all of the child assemblies. Then select the base point of the new assembly.
- Delete Assembly – This will delete the assembly and all of the child assemblies.
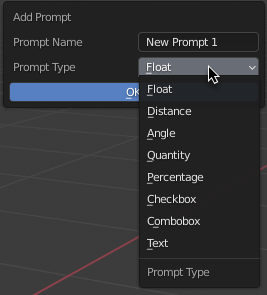
What are Prompts?
Prompts are very similar to custom properties in Blender. The main difference is prompts provide users with the ability to specify an prompt type.
The available prompt types are:
- Float – A numeric value with or without a decimal
- Distance – A numeric value that is used to specify a distance in 3D space. This number will be formatted based on your current units.
- Angle – A numeric value that is used to specify an angle. This number will be formatted based on your current units.
- Quantity – An Integer value that’s minimum value is 0.
- Percentage – A numeric value that is used to specify a percentage between 0% and 100%
- Checkbox – A boolean value that is used to specify a True or False value. The control is formatted as a checkbox.
- Combobox – A integer value that is used to specify an index value in a list. The control is formatted as a list box where the user can select an item in the list.
- Text – A string that is used to specify a text value.
What are Calculators?
Calculators are a special grouping of distance prompts that are intended to calculate the total distance equally between all of the prompts in that group. A good example of where this is used is calculating drawer front heights.
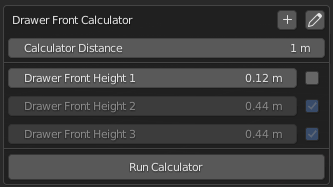
The plus icon in the top left will add a prompt to the calculator. The pencil icon will allow you to rename the calculator.
The Calculator Distance is the total distance to calculate. The Prompts listed below are all of the the values in that calculator. The checkbox next to the value determines if that value should be equally calculated or if the user is setting a custom value.
The Run Calculator button will calculate the distance all of the prompts.
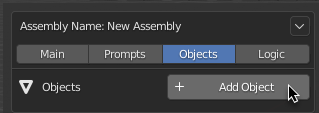
Adding Objects to Assemblies
You can add as many objects as you need to an assembly. All Blender object types are supported. In the Objects tab you can select the Add Object button.
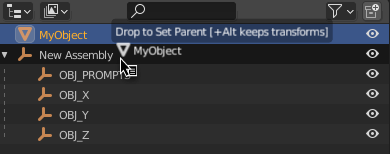
If you already have an object created that you want to add to an assembly you can simply parent the object to the base point of the assembly. This is done by dragging the object onto the base point object in the outliner. You may need to hold shift when dropping the object onto the base point.
Making a mesh change size with the assembly
By default when you add a mesh to the assembly the mesh will not automatically change size. You need to assign the vertices of the mesh to specific empties in the assembly. This will typically be the X, Y, and Z dimension object of the assembly, but you can include other empty objects you have added to your assembly.
To assign vertices to the different objects:
STEP ONE: Select the mesh you want to change size.
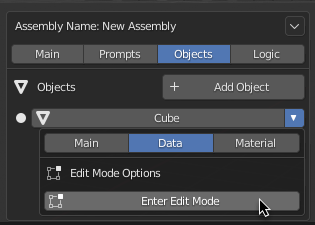
STEP TWO: Enter Edit Mode. In the object drop down menu in the data tab you will find the button to access edit mode.
STEP THREE: Select the Vertices you want to assign to an object.
STEP FOUR: Select the Assign to – OBJ_name button to assign the selected vertices to the object. The number next to the name shows how many vertices are assigned to that vertex group.
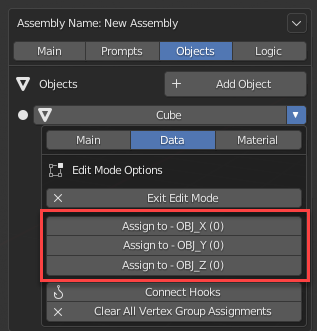
STEP FIVE: Do this for all vertices you want to assign.
STEP SIX: Click the Connect Hooks button. This will switch you back to object mode where you can test if the vertices have been assigned correctly.
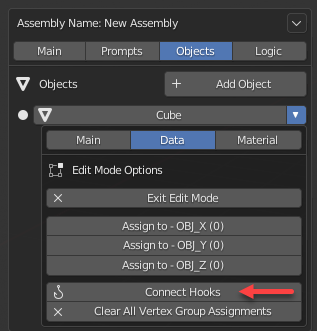
If you make a mistake you can delete all of the hook modifiers that were added to the object then click the Clear All Vertex Group Assignments button.
Working with Drivers
Drivers are the backbone of how you create parametric assemblies. Drivers allow you to write formulas to calculate a property of an object. You can add a driver to a property by right clicking on a value in the interface then selecting Add Driver.
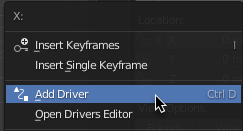
This will pop up an interface and allow you to write a formula, but assemblies include a better interface, so move your cursor away from the dialog and it will close.
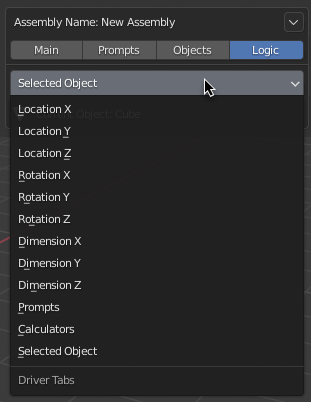
The drivers you have added to your assembly will appear in the Logic tab. The drop down at the top will allow you to see a specific driver for the assembly.
The expression field allows you to write a formula using variables that are listed below.
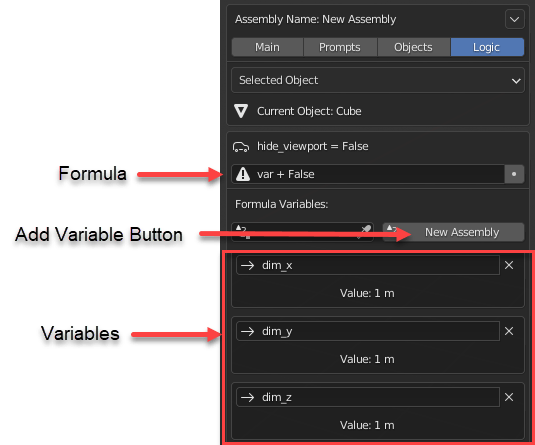
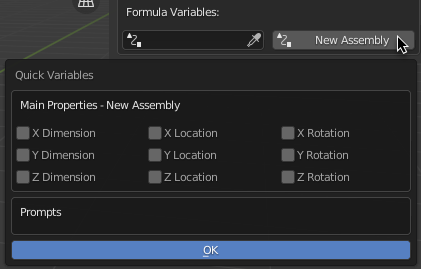
To add a variable click the button in the top right corner of the driver. This will display all of the properties can be used in the assembly. Check the boxes of the variables you want to use then click OK.
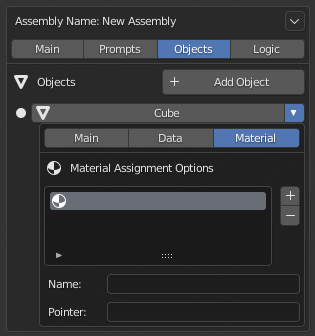
Working with Material Pointers
Material pointer are assigned to material slots of an object. They allow you to assign a meaningful name to the material slot and a pointer name. A pointer name is a simple text property that can be implemented by add-ons.
Creating Python Assemblies
While it’s helpful to create assemblies in Blender’s 3D Interface the real power of assemblies come from creating assemblies with Python.
In the PyClone add-on there is a python package called pc_lib that provides some helpful classes and functions to work with Assemblies.
Additional training information will be created soon to give users an understanding of how to work with Assemblies using Python.

Leave a comment